Introduction
The GuardsPro Client App is designed to provide a seamless and intuitive experience for security personnel and management teams. From initial onboarding to detailed reports, the app ensures a smooth workflow across various processes. In this blog, we’ll take a look at the key screens and features that make the app a must-have tool for modern security management.
1. Onboarding Screen: A Smooth Introduction
The Onboarding Screen is the first step to help users get familiar with the app’s features. Upon opening the app, users are greeted with an intro screen featuring a horizontal pageview slider. This allows users to swipe left or right to view a series of onboarding slides, which introduce the app’s key features and benefits.
- Pageview Indicator: Users can see which slide they’re on, making navigation intuitive.
- Skip Button: For users who want to bypass the intro, there’s a Skip button that directs them straight to the next screen.
- Get Started Button: At the end of the onboarding sequence, the Get Started button appears, inviting users to log in or sign up.
2. Authentication Screens: Login, Sign Up, and Forgot Password
Once the user is ready to begin, they can proceed to the Login Screen. Here’s a breakdown of the authentication process:
Login Screen
- Email and Password Fields: Simple fields for entering login credentials.
- Login Button: Users can log in directly.
- Forgot Password Link: A tappable text link takes users to the password reset page if they’ve forgotten their credentials.
Forgot/Reset Password Screen
- A screen where users can reset their password by entering their email address.
3. Select Company: Choose Your Company
Once authenticated, users are prompted to Select a Company from a list. The process includes:
- Tapping on a Company: Users tap on the company they wish to associate with.
- Confirmation Dialogue Box: A prompt confirms the user’s selection.
- Next Screen Navigation: Upon confirmation, users are directed to the Select Post Site Screen.
4. Select Post Site: Choose the Right Location
Choosing the right Post Site is essential to ensure security tasks are assigned to the correct location.
- Fetching Post Site List: The app fetches the post sites from an API based on the selected company ID.
- Post Site List: A list of available post sites for the selected company is displayed.
- Confirmation Dialogue: When a user taps on a post site, a confirmation dialogue appears for the user to confirm the selection.
- Main Screen: After confirming the post site, users are directed to the Main Screen to begin their security tasks.
5. Drawer Menu: Easy Navigation
The Drawer Menu provides easy access to important features:
- User Profile: Full name, email, phone number, and profile picture.
- Select Company: Quick access to change the selected company.
- Settings:
- Notifications
- Select Language
- Contact Support: For any issues, users can easily get in touch with support.
- About: Learn more about the app.
- Logout: Located at the bottom for easy access.
The drawer starts at the Select Company Screen and allows users to navigate through various options with just a tap.
6. Main Screen: Your Dashboard
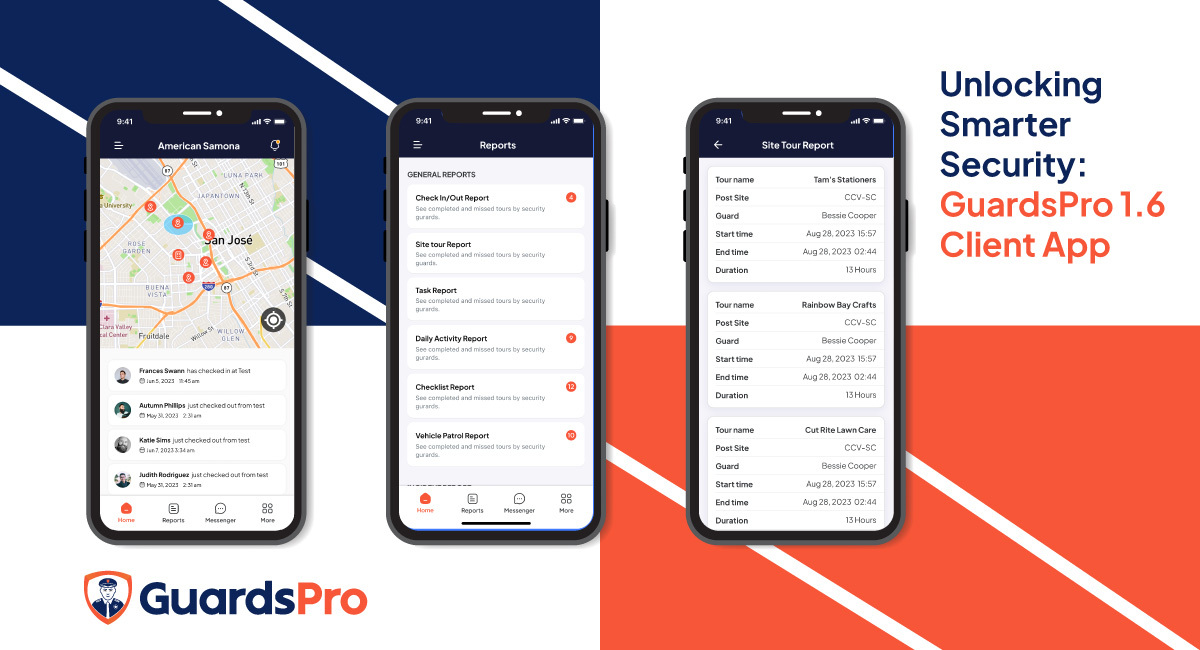
The Main Screen serves as the central hub for the app’s functionalities:
- App Bar: Displays the app title and key navigation options.
- Location Map: Shows the map with markers indicating important locations.
- Notification List: A feed of all important notifications and alerts.
- Bottom Navigation Bar: Fixed bar for easy access to key sections of the app, ensuring users can quickly switch between different views.
7. Reporting Screens: Detailed and Customizable Reports
The Reports Screen gives users access to various reports, including General Reports, Incident Reports, Standard Reports, and Log Reports. Users can tap on report tiles to view more detailed information.
CIOR (Check-In/Out Report) Screen:
- A list of CIOR reports that users can filter by date and guard.
Site Tour Reports:
- Site Tour Report List with pagination, filters for date and guard, and detailed descriptions of each tour.
Task Reports & DAR (Daily Activity Report):
- Task Report Page: A list of task reports with basic details.
- DAR Report Page: Shows a list of DAR reports, each with relevant fields and information.
Checklist & Vehicle Patrol Reports:
- These reports provide a detailed view of checklist and vehicle patrol activities, helping security managers track various tasks.
Incident and Hourly Reports:
- Incident Reports provide an in-depth view of incidents, while Hourly Reports offer logs and activities on an hourly basis.
Watch Mode Logs & Tour Checkpoint Reports:
- Users can check Watch Mode Logs and view Tour Checkpoint Reports for a comprehensive look at security patrol activities.
8. Tour Checkpoint Report Detail Page
The Tour Checkpoint Detail Page provides users with a full breakdown of a selected report. This detailed view includes:
- All checkpoints covered during the tour.
- Notes and media files attached to the tour.
Conclusion
From the initial Onboarding Screen to in-depth Report Screens, the GuardsPro Client App is packed with features designed to streamline security operations. Each screen is thoughtfully designed to ensure ease of use, while powerful functionalities ensure security management is efficient and comprehensive. With tools for authentication, company and post site selection, detailed reports, and more, GuardsPro is built to help you manage security operations with confidence and control.

